Looking for more traffic sources? Great! Then it is time to mention that the nice people of EvaDav are now giving a $50 signup bonus. Let’s help you set up Sublime Revenue with EvaDav for conversion tracking…
- Sign up, log in and get your $50 bonus after your fist deposit. We recommend using your Crypto card to get a cashback bonus, too. 😉
- From the left pane menu go to Campaigns page.
 Then on your right you will find the create campaign button.
 The important part is to get your postback URL right there.
 Copy that. You will need it for the next step.
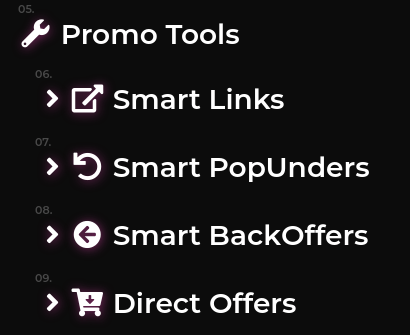
- Log in to your Sublime Revenue dashboard. Navigate to your favorite offer from Menu > Promo Tools > Direct Offers
 In this case we picked the amazingly converting mobile click2call offer 692 – Win iPhone 12 Pro Max. Looks like everyone wants that phone, especially when it is free. Even the ones already having iPhones. What a hype…
- Go to S2S postback tab within the offer details on the offer page.
 Add a new postback entry with the specified add button.
 Turn the tick to ON.
 The method should be GET.
 Now paste the postback URL in the input box below these options replacing the value {CLICKID} with our token [external_clickid] and the value {PAYOUT} with our token [payout_USD]. You should end up with a setting like this below.
 Now is time to save your postback and close the S2S Postback tab.
- Now let’s customize that promo tool URL for your campaign the way you like… This is how we did it.
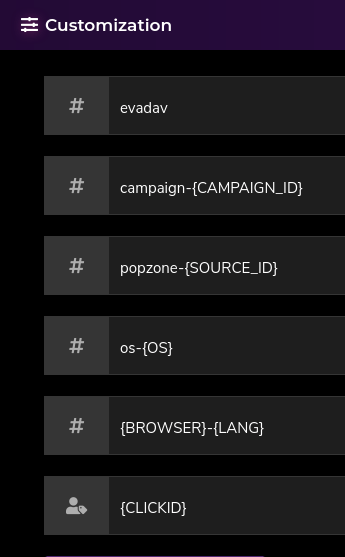 Feel free to use the tokens provided by EvaDav based on your campaign needs. The important part is to enter the {CLICKID} value in the External Source Click ID input box. When done customizing the promo tool tracking options just apply them with the button.
 Now copy your promo tool URL from the links tab.
 You just need to click on it and this wonderful message will appear.
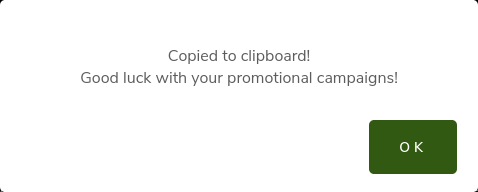 It is a good idea to have different landing pages in separate campaigns for optimal performance tracking.
- Now that your promo tool is copied to your clipboard and good luck is being wished to you, it is time to create your first EvaDav campaign, so get back to that create campaign page. In this case we set up a popunder campaign. Popunder is not dead. Not at all!
It is time to name your campaign the way you like. As noted in point 6 here we recommend naming your campaign with details in order of segmentation. This is very useful when your running campaigns number gets high. Organization is key.
For pricing model we picked Smart CPM.
It is a good idea to set a campaign group, for example by offer niche.
Now paste that promo tool URL in the Target URL input box. The tokens you used should light up in EvaDav green like so. We recommend setting frequency capping (per day) to 1.
Now it is time to pick your GEO. It is a good idea to target 1 GEO per campaign.
Set the CPM to at least the recommended setting.
If you do not see the “Mobile phone” option in your device targeting settings, contact your EvaDav account manager. They will enable it for you. At least this is how it was for us.
Pick one OS per campaign. For example only iOS.
Pick only one connection type per campaign, e.g. only Wi-Fi or only carrier 1, only carrier 2 for that GEO.
It is a good idea to create a black list of non-converting zones and a white list of converting zones. Here is our example for this campaign. If clicks is greater than 3000 and leads is less than 1 for last 7 days – blacklist. If ROI is greater than 80% for the last 7 days – whitelist.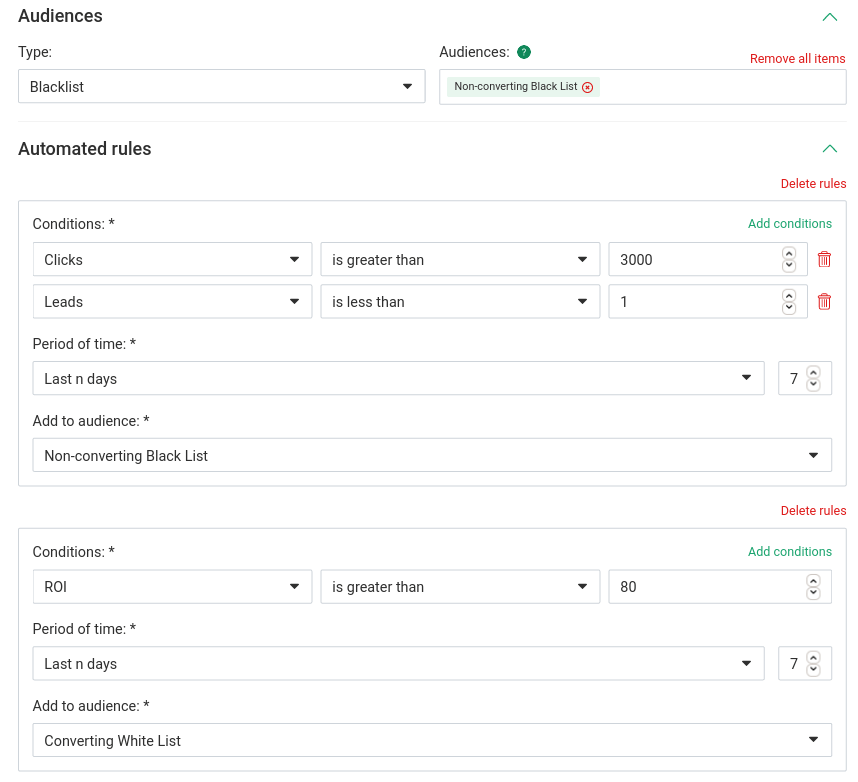 Feel free to play with this the way you like. Do the math based on expected cost, traffic volume, conversion payout, etc. The formula should not be too complex. Aim for positive ROI and let’s see… This is only a recommendation to block non-converting sources and keep good sources for scaling up your campaigns.
- Send your campaigns to moderation with the create button.

- Duplicate your campaign and set up other targeting options like other OS for the same GEO+connection setting, etc.
IMPORTANT Please, note that the balance of the account and the budget limits of a campaign affect your win rate through the auction participation algorithm EvaDav came up with in campaign traffic bids as follows:
$150 then campaign participates in 75% of auctions
$120 then campaign participates in 70% of auctions
$100 then campaign participates in 40% of auctions
$80 then campaign participates in 30% of auctions
$60 then campaign participates in 25% of auctions
$50 then campaign participates in 15% of auctions
$40 then campaign participates in 10% of auctions
$30 then campaign participates in only 3% of auctions
$20 then campaign participates only in 1% of auctions
Ha-ha! Now you know! Good luck!
Related Posts
Ad network you can trust... They say. Let's see about that. Not that I have any doubts, really. The place literally says in it's name what it offers. Exactly what we all need - traffic. And it's a shop. In fact I…
Some of you may already have heard about them, but hey, today we will be introducing another great traffic source - PopCash. It is really easy to integrate Sublime Revenue with them in several easy steps. Here it goes: Once signed up…
It's time we discuss another traffic source today, namely MGID. You may have noticed a post about the amazing 25% deposit bonus we could offer with them. If not, make sure to check it out. Absolutely worth it. So, what works best…